Introduction
Tired of wrist pain, shoulder aches, or just general discomfort after a long day at your keyboard? You’re not alone. Many of us spend countless hours typing, whether for work, gaming, or creative pursuits. The good news is that you don’t have to suffer in silence. A properly set up ergonomic keyboard can be a game-changer, transforming your typing experience from a pain point into a pathway to productivity and comfort. This guide will walk you through the essentials of setting up your keyboard ergonomically, ensuring you can type for longer, more comfortably, and with less risk of strain.
Why Ergonomics Matters for Keyboard Users
Before we dive into the “how,” let’s briefly touch on the “why.” Ergonomics is all about designing and arranging workspaces to fit the user, rather than forcing the user to fit the workspace. When it comes to keyboards, poor ergonomics can lead to a range of issues, from minor discomfort to serious conditions like Carpal Tunnel Syndrome or repetitive strain injury (RSI).
Imagine Sarah, a graphic designer who spends eight hours a day editing on her computer. For months, she ignored a persistent ache in her right wrist. Eventually, the pain became so severe that it impacted her ability to work and even simple daily tasks. After consulting a doctor, she learned her setup was contributing significantly to her wrist issues. By making a few simple ergonomic adjustments to her keyboard and overall workstation, she found significant relief and improved her long-term hand health. Understanding the principles of ergonomic setup can help you avoid Sarah’s struggles and ensure your typing habits support your well-being.
The Foundation: Your Chair and Desk
While this article focuses on keyboards, it’s crucial to understand that your keyboard setup is part of a larger ergonomic ecosystem. Your chair and desk are the foundational elements.
- Chair: Your chair should provide good lumbar support, allowing your spine to maintain its natural S-curve. Your feet should be flat on the floor or on a footrest, and your knees should be at roughly a 90-degree angle. Adjustable armrests are also a plus, as they can help support your forearms and reduce tension in your shoulders.
- Desk: Your desk height is equally important. When sitting comfortably, your forearms should be roughly parallel to the floor, and your elbows should be at a 90- to 100-degree angle when reaching for your keyboard. If your desk isn’t adjustable, consider a keyboard tray or a monitor stand to achieve the correct heights.
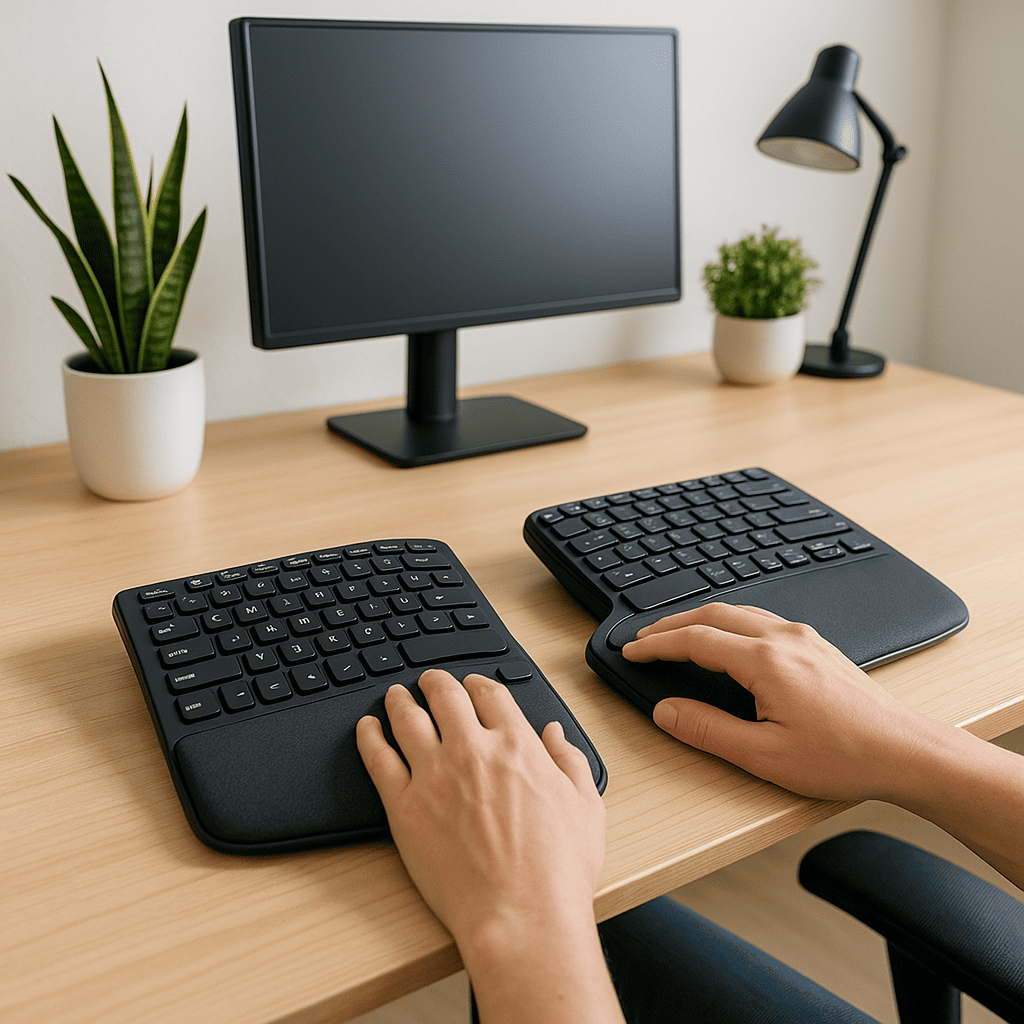
Positioning Your Keyboard for Optimal Comfort
Once your chair and desk are sorted, it’s time to focus on your keyboard. Proper positioning is key to minimizing strain.
- Centered and Straight: Your keyboard should be directly in front of you, centered with your body. This helps keep your wrists and forearms in a neutral, straight line, avoiding awkward bending or twisting. If you use a numerical keypad frequently, you might find an external keypad more comfortable to avoid constantly shifting your main typing position.
- Close to Your Body: Keep your keyboard close enough so you don’t have to reach or stretch your arms forward. This reduces strain on your shoulders and upper back. Your elbows should ideally be close to your body.
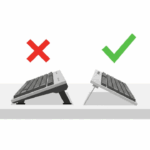
- Flat or Slightly Negative Tilt: Many keyboards come with flip-out feet that create an upward tilt. While this might feel natural at first, for ergonomic purposes, it’s often better to keep your keyboard flat or even with a slight negative tilt (where the front edge is slightly higher than the back). This helps keep your wrists in a neutral position, preventing extension.

The Wrist Rest Debate
Wrist rests can be helpful for some, but they are often misunderstood. Their purpose isn’t to rest your wrists while typing, but rather during breaks between typing. When you type, your wrists should float above the keyboard. If you’re resting your wrists on a pad while actively typing, you’re putting pressure on the sensitive carpal tunnel area, which can actually increase the risk of injury. Choose a wrist rest that matches the height of your keyboard’s front edge.
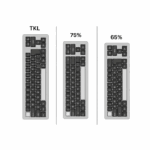
Understanding Keyboard Types and Ergonomic Features
Not all keyboards are created equal when it comes to ergonomics. Understanding the different types and their features can help you make an informed choice.
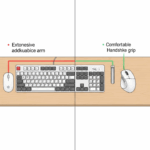
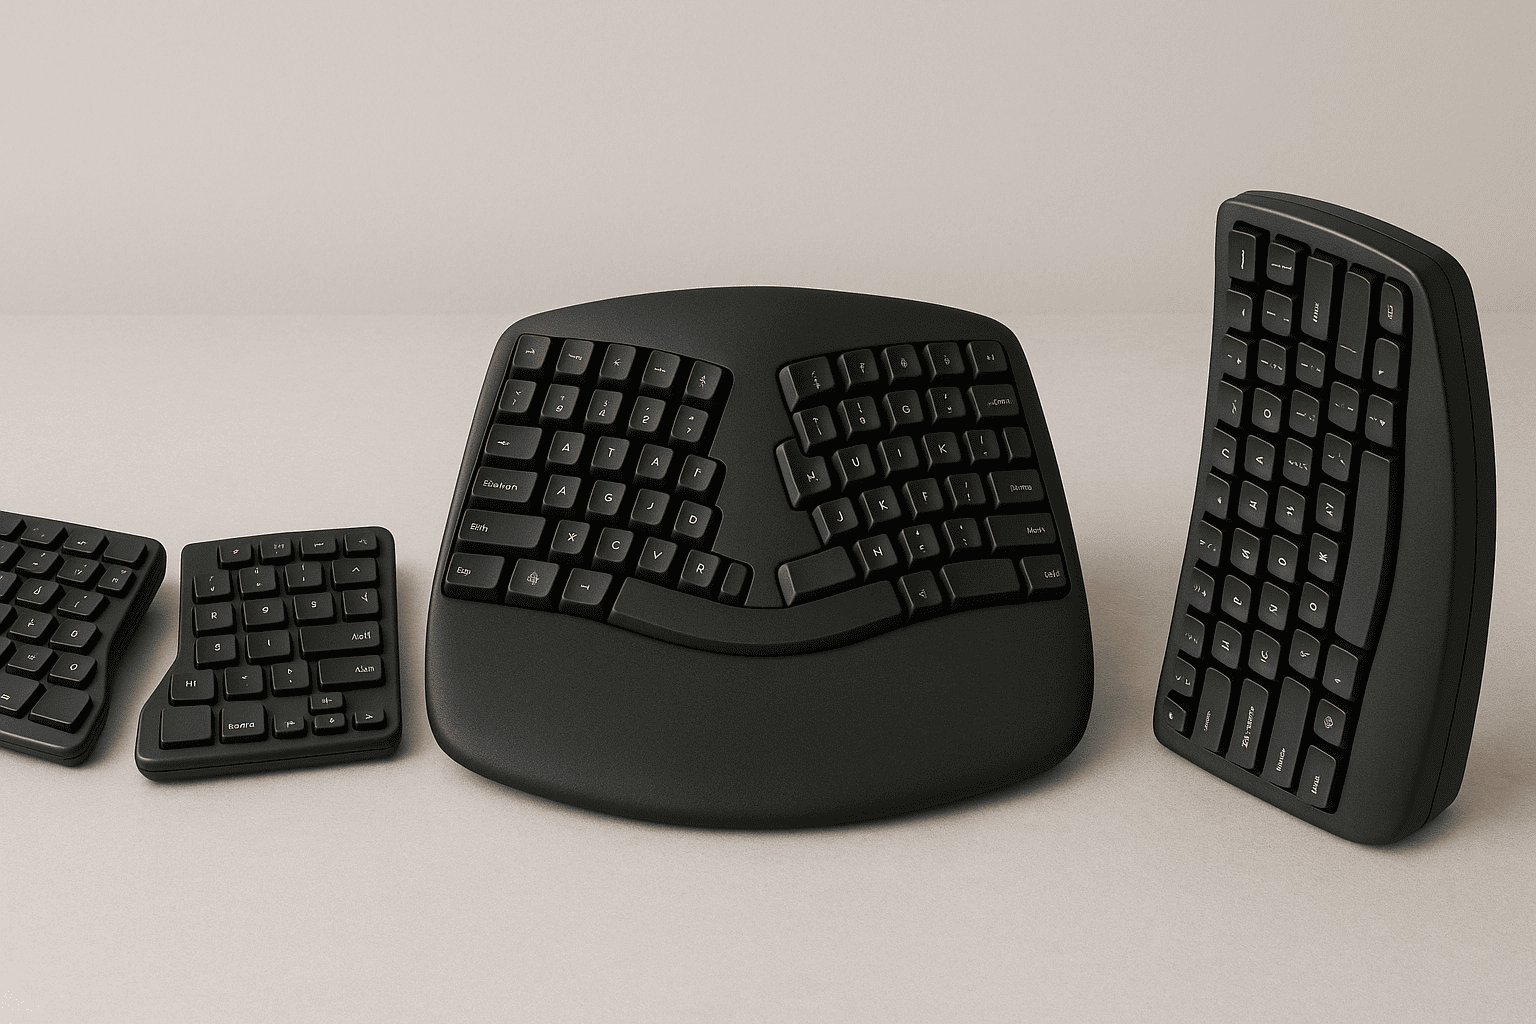
- Split Keyboards: These keyboards separate into two halves, allowing you to position each hand independently. This can be great for reducing ulnar deviation (when your wrists bend outwards) and shoulder tension, as you can spread your arms more naturally.
- Contoured and Tented Keyboards: Many ergonomic keyboards feature a curved or “tented” design, where the middle of the keyboard is raised. This helps to reduce pronation of the forearms (the inward rotation of your lower arm), allowing your hands to rest in a more natural, handshake-like position.
- Key Switches (for Mechanical Keyboards): If you’re considering a mechanical keyboard, the type of key switch can also play a role in comfort. Lighter actuation force (the pressure needed to register a keypress) can reduce finger fatigue over long typing sessions. Switches like linear (smooth, consistent travel) or tactile (a bump to indicate actuation) are generally preferred over clicky switches for ergonomic purposes due to their smoother feedback and often lighter actuation.
Beyond the Hardware: Typing Habits and Breaks
Even with the most perfectly set up ergonomic keyboard, poor typing habits can undermine your efforts.
- Maintain Neutral Wrist Position: This is perhaps the most crucial tip. Your wrists should be straight, not bent up, down, or to the sides. Imagine a straight line from your elbow through your wrist to your fingertips.
- Light Touch: Don’t hammer the keys. A light, gentle touch is all that’s needed to register a keypress. This reduces impact on your fingers and wrists.
- Use Your Whole Hand: Try to use all your fingers when typing, not just a few. This distributes the workload and prevents overuse of individual fingers.
- Take Regular Breaks: This is non-negotiable. Every 30-60 minutes, take a short break (5-10 minutes). Stand up, stretch, walk around, and give your hands and eyes a rest. Consider using a timer to remind yourself.
- Stretching: Gentle stretches for your wrists, fingers, and forearms can help prevent stiffness and improve circulation. Simple stretches like extending your arm and gently pulling your fingers back towards your body can make a difference.
For example, consider Mark, a software developer. He invested in a split ergonomic keyboard and adjusted his desk height, but still felt some discomfort. A colleague suggested he start taking regular micro-breaks and perform simple wrist stretches every hour. These small changes, combined with his ergonomic setup, significantly improved his comfort and focus throughout his workday.
Advanced Considerations and Fine-Tuning
As you become more attuned to your ergonomic needs, you might explore more advanced adjustments:
- Programmable Keyboards: Some keyboards allow you to remap keys or create macros. This can be incredibly useful for reducing repetitive motions. For instance, if you frequently type a specific phrase, you could assign it to a single key combination.
- Mouse and Other Peripherals: Don’t forget your mouse! An ergonomic mouse that fits your hand well and allows for a neutral wrist position is just as important as your keyboard. Consider a vertical mouse to reduce forearm pronation, or a trackball to minimize wrist movement. Position your mouse close to your keyboard to avoid excessive reaching.
- Monitor Placement: Your monitor should be at arm’s length, and the top of the screen should be at or slightly below eye level. This prevents neck strain from looking up or down too much.
Remember, the goal is to create a dynamic workspace that encourages movement and natural postures, rather than locking you into a static position. Experiment with different setups and listen to your body. What works best for one person might not be ideal for another.
Conclusion
Setting up an ergonomic keyboard doesn’t have to be complicated, but it does require attention to detail and a willingness to adjust. By focusing on proper keyboard positioning, understanding different keyboard types, and adopting healthy typing habits, you can significantly reduce discomfort and improve your overall well-being. Think of your keyboard as an extension of yourself; it should support your health, not hinder it. Take the time to evaluate your current setup, make informed choices, and give your hands the comfortable home they deserve. Your future self (and your wrists!) will thank you.