Introduction
You’ve chosen the perfect switches, you have a set of keycaps you love, and your typing speed is better than ever. Yet, something feels… off. When you type, do you hear a hollow echo, a high-pitched metallic “ping,” or a plasticky rattle from your larger keys? The feel of a mechanical keyboard is only half of the sensory experience; the other half is the sound. For many, a keyboard’s acoustics are just as important as the tactile feedback of its switches.
Meet Alex. He loves the tactile feel of his new mechanical keyboard, but he can’t ignore the slightly hollow sound it makes. He watches videos online of keyboards that sound deep, creamy, and satisfying—a sound the community affectionately calls “thock”—and wonders how he can get his own board to sound like that. He’s discovered that keyboard acoustics isn’t an accident; it’s a craft. This guide is for Alex, and for anyone who wants to take control of their keyboard’s sound. We’ll explore what makes a keyboard sound the way it does and walk you through easy, reversible modifications to chase that perfect sound profile.
What Creates a Keyboard’s Sound?
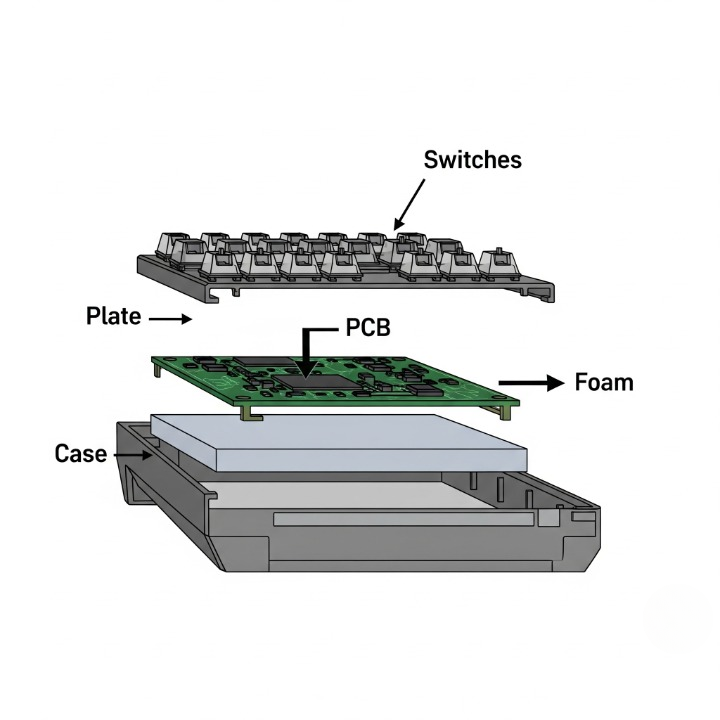
A keyboard is like a musical instrument. Every component works together to produce its unique sound. Understanding these parts is the first step to modifying them.
- The Switches: This is the primary sound source. Clicky switches are designed to be loud, but even non-clicky switches have a distinct sound based on their housing material and stem design. As we covered in our guide to mechanical switches, the internal components play a huge role.
- The Keycaps: The material, thickness, and profile of your keycaps are crucial. Thicker PBT keycaps, which we first discussed in our beginner’s cleaning and customization guide, generally produce a deeper, lower-pitched sound than thin ABS keycaps.
- The Plate: The plate is what holds the switches in place. Plates made of hard materials like brass or steel will produce a higher-pitched, clackier sound. Softer materials like polycarbonate (PC) or POM will absorb more vibration and contribute to a deeper sound.
- The Case: The material of the case (plastic vs. aluminum) and, most importantly, the amount of empty space inside it, have a massive impact. A hollow case acts like an echo chamber, amplifying unwanted noises and creating a hollow sound.
Easy & Reversible Mods for Better Sound
The good news is that you don’t need to be an engineer to dramatically improve your keyboard’s acoustics. Here are three of the most popular, effective, and beginner-friendly mods that are completely reversible if you change your mind.
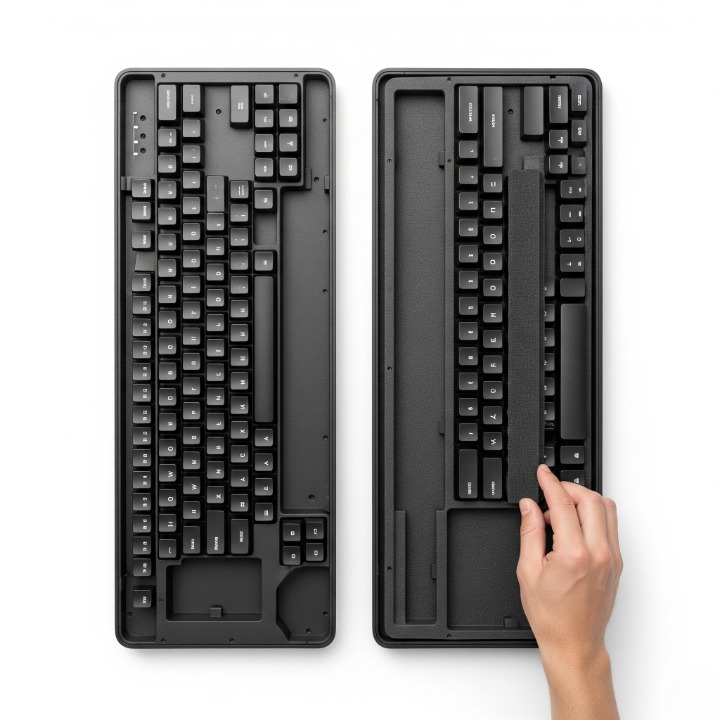
1. The Case Foam Mod
This is the single most effective mod for eliminating hollowness.
- The Problem: The empty space inside your keyboard case acts as an echo chamber.
- The Solution: Fill that empty space with a dense, sound-absorbing material.
- How to do it:
- Unscrew your keyboard’s case to separate the top and bottom halves.
- Carefully disconnect the internal cable that connects the PCB (the circuit board) to the battery or USB port.
- Take a piece of dense foam (like shelf liner, neoprene, or specialized keyboard foam from vendors like Divinikey) and cut it to fit snugly into the bottom case. Make sure to cut out a space for any internal components.
- Place the foam inside, reassemble the keyboard, and enjoy the new, more solid sound.
2. The “Tape Mod”
Popularized by the YouTube community, this mod targets high-pitched frequencies.
- The Problem: Some keyboards produce a high-pitched, almost “brittle” sound.
- The Solution: Apply layers of tape to the back of the PCB to absorb these higher frequencies.
- How to do it:
- Disassemble your keyboard to access the back of the green circuit board (PCB).
- Apply two to three layers of low-tack painter’s tape or masking tape across the entire back of the PCB.
- Use a knife to carefully cut out holes for screws, connectors, and any other components.
- Reassemble. The result is often a deeper, poppier, or “creamier” sound profile. You can hear this effect clearly in many YouTube sound tests demonstrating the tape mod, where the change is often dramatic.

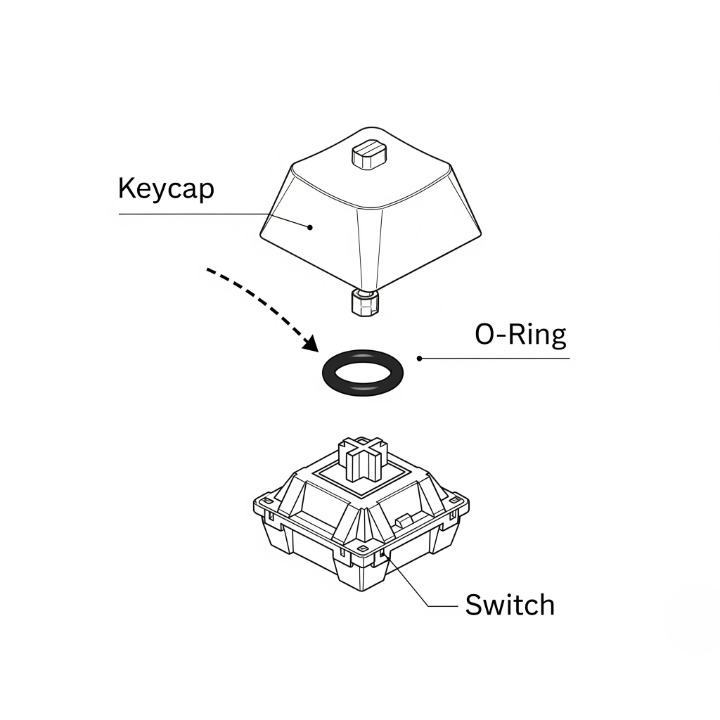
3. O-Rings: The Quick and Quiet Mod
This is the easiest mod on the list and is specifically for making a keyboard quieter.
- The Problem: The “clack” sound of the keycap plastic hitting the switch housing when you bottom out is too loud.
- The Solution: Place a small rubber O-ring around the stem of your keycap.
- How to do it:
- Remove a keycap.
- Place a small, appropriately sized rubber O-ring over the stem on the underside of the keycap.
- Press the keycap back onto the switch. The O-ring now acts as a tiny shock absorber, silencing the bottom-out clack. This is a great option for office keyboards.
Beyond the Basics: The Next Level of Modding
Once you’re comfortable with the basics, a whole world of more advanced modifications opens up. Here are a few to be aware of.
Conclusion
Modifying your keyboard’s sound is a deeply rewarding and surprisingly creative part of the mechanical keyboard hobby. It allows you to tune your primary tool to your exact preferences, transforming it from a mass-produced object into something that is uniquely yours. For Alex, our curious keyboard owner, starting with a simple case foam and tape mod was enough to turn his “pingy” keyboard into the deep-sounding board he was looking for.
Don’t be intimidated by the advanced mods you see online. The journey into keyboard acoustics starts with simple, reversible steps. Try one of the beginner mods this weekend. Listen to the difference it makes. The process is one of experimentation and discovery, and it will give you a much deeper appreciation for the intricate and fascinating world of keyboard customization.