Introduction
There’s nothing quite like the feeling of a new mechanical keyboard. The crisp feedback, the satisfying sound… until you press the spacebar. Instead of a clean, solid sound, you hear a cheap, plasticky rattle that makes your premium keyboard feel like a toy. This distracting noise, common in pre-built and even some custom keyboards, is almost always caused by one culprit: untuned stabilizers.
Meet Daniel. He recently invested in a great mechanical keyboard but found himself avoiding the spacebar because its loud, inconsistent rattle drove him crazy. It was the one part of his board that felt and sounded low-quality. He thought it was a permanent flaw, but soon discovered that with a few simple tools and a little bit of patience, he could fix it himself. This guide is for Daniel, and for anyone tired of hearing that annoying rattle. We will walk you through the process of tuning your stabilizers, a modification that will dramatically improve the sound and feel of your keyboard.
What Are Stabilizers and Why Do They Rattle?
On any keyboard, keys that are two units wide or larger (like Spacebar, Enter, Shift, and Backspace) need extra support to prevent them from wobbling when pressed off-center. That support comes from a stabilizer.
A stabilizer is a simple mechanism consisting of a wire that clips into two plastic housings. Inside each housing is a plastic stem that moves up and down. The rattle comes from a few key sources:
- Wire Rattle: The metal wire hitting the inside of the plastic housing. This is the most common source of noise.
- Stem Wobble: The plastic stem having too much room to move around inside the housing.
- Imperfections: Small inconsistencies in the plastic molding.
Tuning is the process of lubricating and modifying these components to eliminate the empty space and friction that cause these sounds.
Types of Stabilizers: Plate-Mount vs. PCB-Mount
Before you start, it’s helpful to know what type of stabilizers your keyboard has.
- Plate-Mount Stabilizers: These clip directly into the keyboard’s plate (the metal or plastic sheet that holds the switches). They are common in many pre-built, hot-swappable keyboards. They are easy to remove and work on.
- PCB-Mount (Screw-in) Stabilizers: These mount directly onto the Printed Circuit Board (PCB) and are secured with screws. They are considered more stable and are the standard for most custom keyboard builds. To work on these, you will likely need to disassemble your keyboard and may need to de-solder your switches if your board is not hot-swappable.
The Essential Tuning Toolkit
You only need a few specific items for this job. Having the right tools makes the process much easier.
The Three Steps to Perfect Stabilizers: Clip, Lube, and Balance
This process is the community-standard way to achieve rattle-free stabilizers. For a detailed video walkthrough, we highly recommend searching on YouTube for “how to lube stabilizers.“ Look for guides from popular keyboard creators like Alexotos or Taeha Types, as they provide excellent visual instructions.
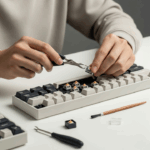
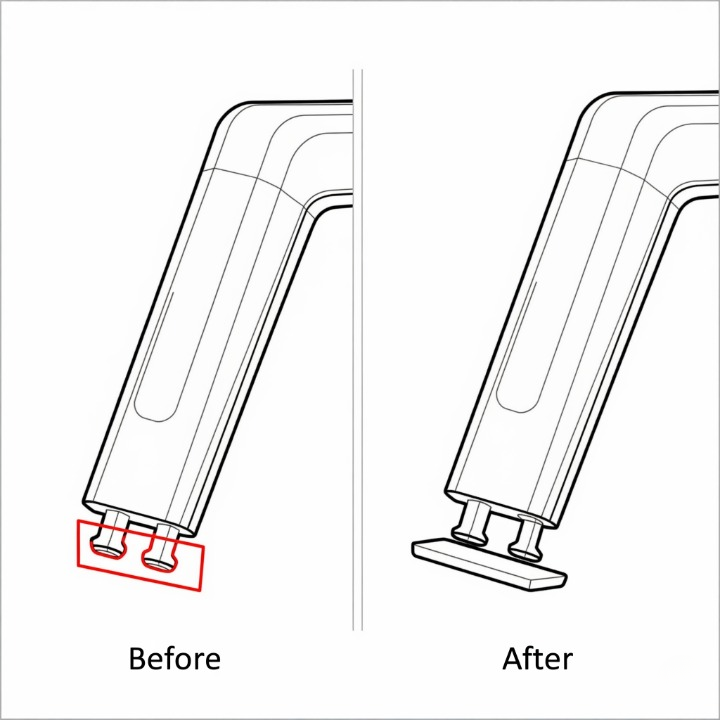
Step 1: Clipping the Feet
First, disassemble the stabilizer by gently prying the wire out of the stem clips. On the bottom of the plastic stem, you will see two tiny “feet.” These are a relic of old designs and now only serve to create a mushy, soft bottom-out. Take your flush cutters and clip these two feet off so the bottom of the stem is completely flat. This makes the key feel crisper when it lands.
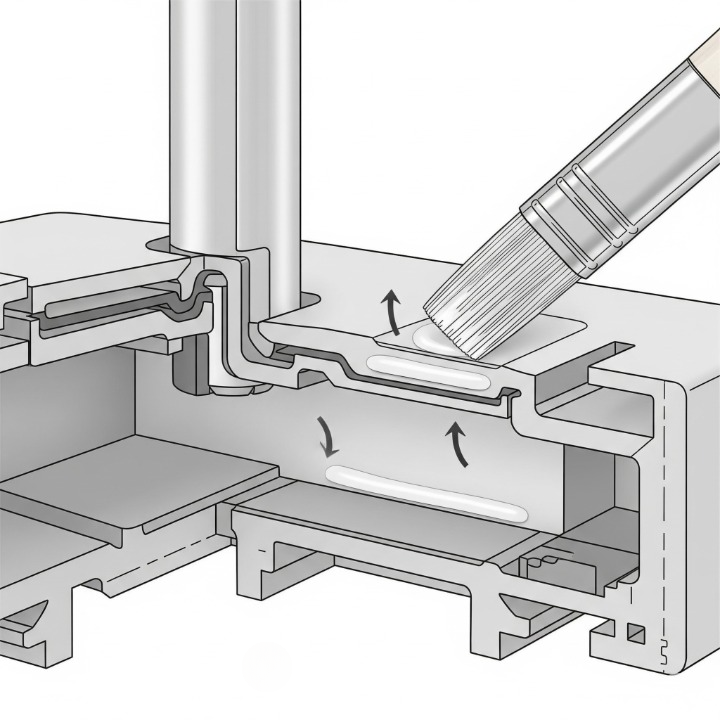
Step 2: Lubing the Housings and Stems
Take your fine brush and apply a thin, even coat of your thick lube (like Krytox 205g0) to the inside walls of the stabilizer housing where the stem makes contact. You don’t need much—just enough to create a smooth surface. You can also apply a very light coat to the sides of the stem itself. The goal is to reduce plastic-on-plastic friction.
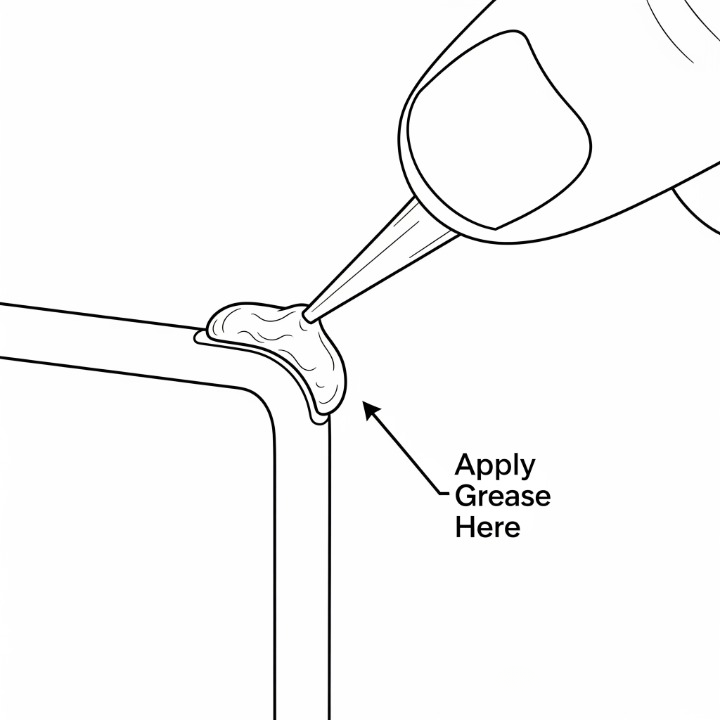
Step 3: Lubing the Wire (The “Plumber’s Method”)
This is the most critical step for eliminating rattle. Take a generous amount of your dielectric grease and apply it to both ends of the stabilizer wire, specifically where the wire bends and where it will clip into the stem. You want to fill the corner of the bend. Don’t be shy with the grease here; too much is better than too little.
Once lubed, carefully re-insert the wire into the lubed stems and housings. Snap the stabilizer back into your plate or PCB. You should immediately notice a deeper, more solid sound when you test it. A well-tuned stabilizer is a key part of achieving a great sound profile, along with other keyboard sound dampening mods.
Troubleshooting Common Issues
- Still Rattling? You may not have used enough dielectric grease on the wire. It’s safe to add more. Also, check if your stabilizer wire is perfectly flat by placing it on a flat surface like your phone screen. If it’s bent, gently bend it back until it lies perfectly flat.
- Feels Mushy or Sluggish? You may have used too much thick lube inside the housing. Disassemble the stabilizer and wipe some of it away with a clean cloth.
Conclusion
Tuning your keyboard’s stabilizers is one of the most satisfying and impactful modifications you can make. It elevates the user experience on a level that few other mods can. It transforms the largest and most-used keys from a source of annoyance into a solid, premium-feeling pleasure to use.
For Daniel, taking an hour to tune his stabilizers was all it took to make his keyboard feel truly complete. That annoying rattle was replaced by a clean, satisfying sound that matched the rest of the keys. So, if you’re tired of hearing that spacebar rattle, don’t despair. With a few simple tools and this guide, you have the power to fix it and unlock the true potential of your mechanical keyboard.