Introduction
You’ve cleaned your keyboard, maybe even swapped out your keycaps for a fresh new set. You’re enjoying a typing experience that is cleaner and more personalized. But as you delve deeper into the keyboard community, you keep seeing terms like “Linear,” “Tactile,” “Gateron Reds,” or “lubed switches.” You start to realize that the look of the keycap is only half the story; the true heart of a mechanical keyboard—the component that defines its feel and sound with every press—is the switch that lies beneath.
Meet Mark. He recently bought his first mechanical keyboard after reading a comparison of popular low-profile models and loves the upgrade from his old membrane board. However, he’s curious. Why do some keyboards feel smooth as silk, while others have a noticeable bump, and others still produce a sharp, satisfying click? He wants to understand the magic happening under the hood. This guide is for Mark, and for you. We’ll demystify the world of mechanical switches, from their basic anatomy to the subtle art of lubrication, so you can choose or build a keyboard that feels perfect for you.
The Anatomy of a Switch: What’s Inside?
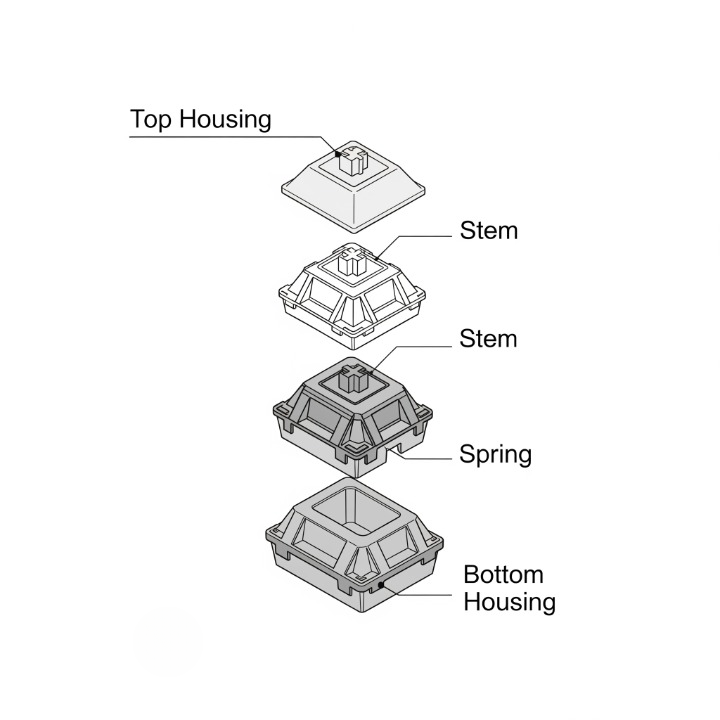
Before we discuss the different “flavors” of switches, it helps to understand what one actually is. A mechanical switch is a small physical mechanism that registers a keypress. Unlike a membrane keyboard that uses a simple rubber dome, each key on a mechanical board has its own complete switch. While designs vary, most standard switches contain four core components:
- The Stem: This is the colored part you see when you remove a keycap. Its shape is what primarily determines the switch’s feel (e.g., if it has a bump or not).
- The Housing: The outer casing (top and bottom) that holds all the components together. Its material can affect the switch’s sound.
- The Spring: This sits inside the housing and provides the resistance you feel when pressing a key. The weight and length of the spring determine how “heavy” or “light” the switch feels.
- The Metal Leaf: Two small metal contacts that are pushed together by the stem’s movement. When they touch, an electrical circuit is completed, and a keystroke is sent to your computer.
The Three Main Flavors: Linear, Tactile, and Clicky
This is the most important distinction in the world of switches. Nearly every switch falls into one of these three categories, which describe the physical sensation of pressing the key down.
Linear Switches: Smooth and Consistent
Imagine pressing a key and feeling a single, smooth, uninterrupted motion from top to bottom, like a hot knife through butter. That’s a linear switch. There is no bump and no click—just a consistent amount of force required all the way down.
- Who are they for? Gamers often prefer linear switches because their smooth, predictable action allows for rapid, repeated keypresses without any tactile interference. They are also favored by people who want a quiet keyboard or simply enjoy the effortless feel.
- Popular Examples: Cherry MX Red, Gateron Red, Kailh Red. (The red color is a common, though not universal, identifier for linear switches).
Tactile Switches: The Satisfying Bump
Tactile switches are the happy medium and arguably the most popular choice for typing. As you press the key down, you’ll feel a small but distinct “bump” midway through the travel. This bump is the switch’s way of telling your finger, “Okay, you’ve pressed me successfully!” This feedback happens right at the actuation point, so you know the keypress has registered without needing to press the key all the way down (“bottoming out”).
- Who are they for? Typists, programmers, and general users love tactile switches. The feedback confirms each keystroke, which can help improve accuracy and reduce typos, without the noise of a clicky switch.
- Popular Examples: Cherry MX Brown, Gateron Brown, Zealio V2.
Clicky Switches: The Audible Feedback
Clicky switches are the most overtly “mechanical” of the bunch. They provide the same tactile bump as a tactile switch, but they pair it with a sharp and intentional “click” sound. This sound is produced by a secondary mechanism inside the switch, often called a “click jacket” or “click bar.”
- Who are they for? Typists who love audible feedback and the classic, typewriter-esque sound. They provide the most complete sensory experience (feel and sound), but be warned: they are loud and may not be suitable for quiet office environments or late-night gaming sessions.
- Popular Examples: Cherry MX Blue, Gateron Blue, Kailh BOX White.
By the Numbers: Key Switch Specifications Explained
To compare switches, manufacturers use a few key metrics. Understanding these can help you fine-tune your choice.
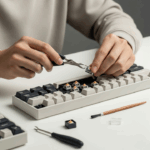
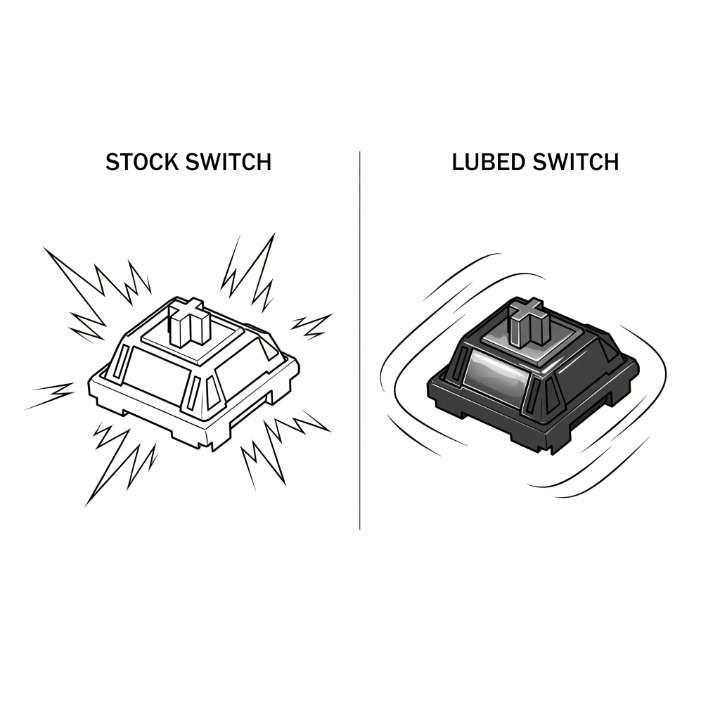
The Lube Factor: Taking Your Switches to the Next Level
For those who want to achieve the absolute best feel and sound from their switches, there is lubing. This process involves carefully disassembling each switch and applying a thin layer of specialized lubricant (like Krytox 205g0) to the internal components, such as the stem rails and spring.
What does lubing do?
- Smoothness: It dramatically reduces friction, making linear switches feel even smoother and removing any “scratchiness” from tactile switches.
- Sound: It deepens the sound profile of the switch, dampening high-pitched noises and creating a more pleasant, subdued “thock” sound.
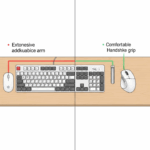
Lubing is a time-consuming, meticulous process, but for many enthusiasts, it’s a rite of passage that elevates a good keyboard into a great one. Choosing a switch that feels right for you is a crucial part of creating a truly personalized ergonomic setup.
Conclusion
The world of mechanical keyboard switches is incredibly deep and rewarding. While it may seem complex at first, it all boils down to personal preference. There is no single “best” switch—only the best switch for the way you work and play. The best way to start is by identifying what you value most: the pure smoothness of a linear, the confident feedback of a tactile, or the satisfying report of a clicky switch.
From there, don’t be afraid to experiment. Many companies sell inexpensive “switch testers,” which are small boards with a variety of different switches mounted on them, allowing you to feel them side-by-side. Your keyboard is the most tactile part of your computing experience. Understanding its heart—the switch—is the key to unlocking a new level of satisfaction and control.