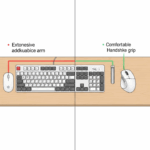
Introduction
You’ve cleaned your keyboard, swapped your keycaps, and maybe even learned the difference between a linear and a tactile switch. You’ve experienced the joy of modifying a pre-built board, but now you feel the pull of the ultimate customization project: building a mechanical keyboard entirely from scratch. The idea can be intimidating, with a sea of components and compatibility questions. But the reward—typing on a machine that you assembled with your own two hands—is one of the most satisfying experiences in the entire hobby.
Meet Mia. She’s been modding her first mechanical keyboard for a few months and is ready for the next challenge. She wants to build a keyboard that is 100% her own, from the sound and feel to the aesthetics, but she’s nervous about choosing the right parts and putting them all together. This guide is for Mia, and for you. We will demystify the process, breaking it down into a clear, step-by-step roadmap from sourcing your components to your very first, perfect keystroke.
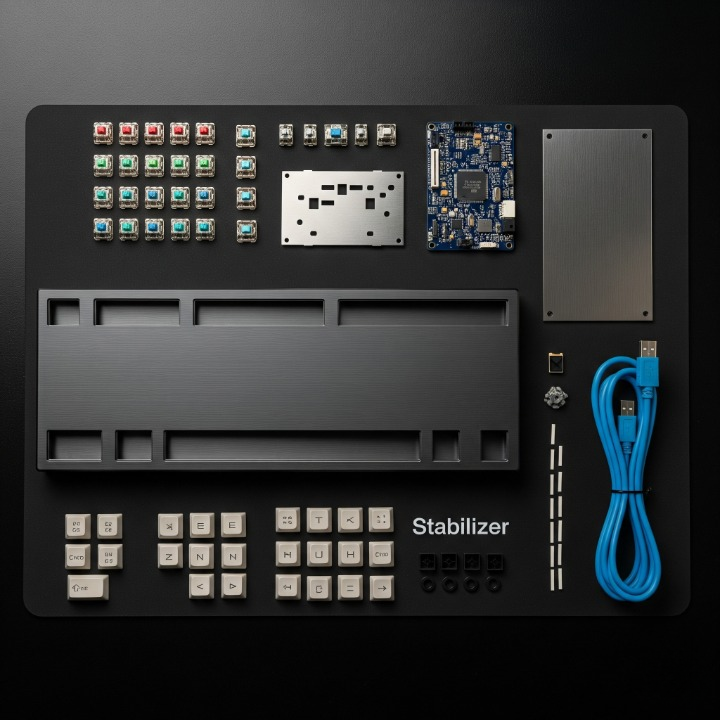
The 6 Core Components of a Custom Keyboard
Before you can build, you need to understand the anatomy of your project. A custom keyboard is made up of six essential parts:
- The Case: The outer shell of the keyboard. It determines the keyboard’s size, weight, and overall aesthetic. Materials range from plastic (affordable) to aluminum (premium) and even polycarbonate.
- The PCB (Printed Circuit Board): The “brain” of the keyboard. This is the circuit board that registers your keypresses. The most important choice here is hot-swappable vs. solder. For a first build, a hot-swap PCB is highly recommended, as it allows you to install switches without any soldering.
- The Plate: The “skeleton” that sits on top of the PCB. The switches clip into the plate, which holds them securely. The plate’s material (e.g., aluminum, polycarbonate, carbon fiber) has a significant impact on the keyboard’s sound and typing feel.
- The Switches: The heart of the keyboard’s feel. As covered in our in-depth guide to mechanical switches, your choice of linear, tactile, or clicky switches will define the entire experience.
- The Stabilizers: The support system for your larger keys (
Spacebar,Enter,Shift). Tuning these is crucial for a premium sound. - The Keycaps: The look and feel of your keyboard. This is where you can express your personality.
Part 1: Sourcing Your Components
For your first build, you have two main options: buying an all-in-one “barebones” kit or sourcing every part individually.
- Barebones Kit: This is the recommended path for beginners. A kit typically includes the case, PCB, and plate, all guaranteed to be compatible. You just need to add switches and keycaps. Vendors like CannonKeys and KBDFans offer excellent starter kits.
- Sourcing Separately: This offers maximum customization but requires careful research to ensure all your parts (especially the case, PCB, and plate) are compatible with each other.
This table will help you plan your build.
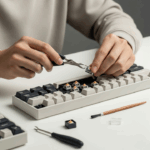
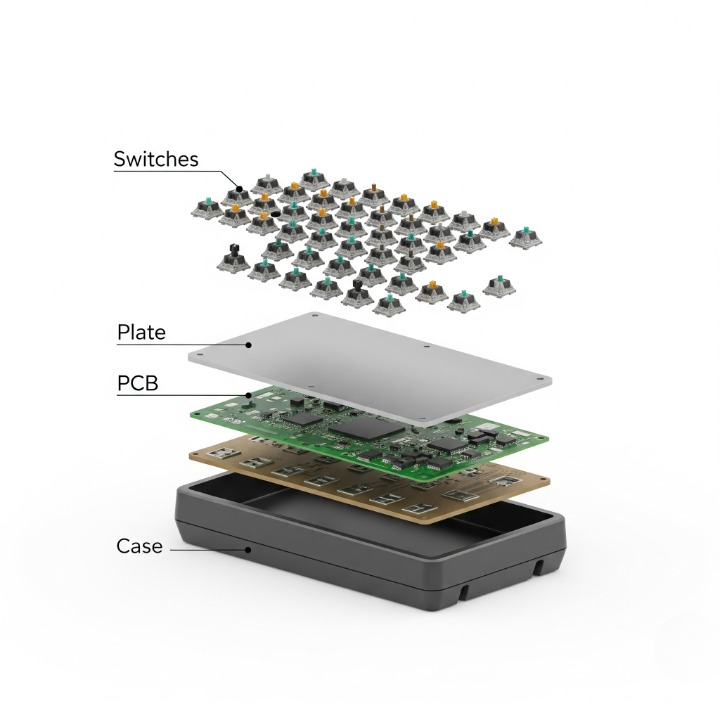
Part 2: The Assembly Process (Step-by-Step)
You have your parts. Now comes the fun. Prepare a clean, well-lit workspace. For a detailed video of a build from start to finish, we recommend searching on YouTube for “custom keyboard build guide”. Channels like Taeha Types or Alexotos offer cinematic and informative build streams.
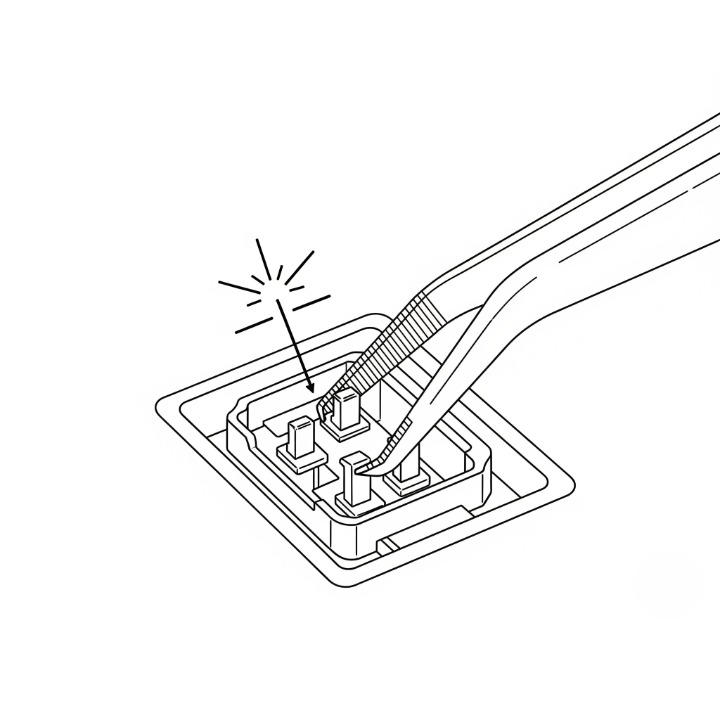
Step 1: Test Your PCB! This is the most important step. Before you assemble anything, plug the PCB into your computer. Use tweezers to touch the two metal contacts for each switch socket. This should register a keystroke on your screen. Test every single key. It is much easier to fix a faulty PCB now than after you’ve built the entire keyboard.
Step 2: Prepare and Install Stabilizers This is your chance to build a rattle-free keyboard from day one. Before installing your stabilizers onto the PCB, make sure to tune them properly. If you’re unsure how, follow our detailed guide to tuning stabilizers to clip and lube them perfectly.
Step 3: Assemble the “Sandwich” (PCB, Plate, Case) First, carefully place the plate over the PCB. Then, mount this assembly into the bottom half of your keyboard case, following the instructions for your specific kit. Secure any necessary screws.
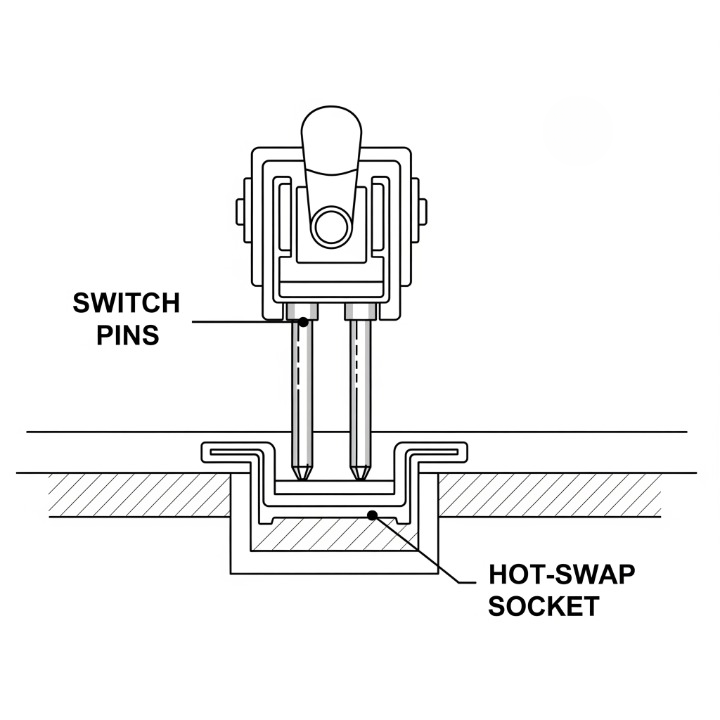
Step 4: Install the Switches This is the most satisfying part. Take a switch and align its pins with the hot-swap sockets on the PCB. Ensure the pins are perfectly straight. Support the back of the PCB with your fingers and press the switch straight down until it clicks securely into place. Repeat for all switches.
Step 5: Install the Keycaps The final aesthetic touch. Gently press your keycaps onto the switch stems. Start with the larger, stabilized keys to ensure they feel right, then fill in the rest.
Step 6: Final Testing Plug in your newly built keyboard and test every key again to ensure everything works as expected.
Conclusion
Building your own custom mechanical keyboard is more than just an assembly project; it’s a declaration of ownership over the tools you use every day. The feeling of typing on a machine that you planned, sourced, and built yourself is unparalleled. For Mia, our aspiring builder, the process transformed her from a user into a creator, giving her a keyboard that was perfectly tailored to her needs and a much deeper appreciation for the hobby.
The journey may seem complex, but by starting with a beginner-friendly kit and following a clear process, anyone can do it. You’re not just building a keyboard; you’re building your keyboard. It’s a rewarding experience that will fundamentally change your relationship with your most important tool.