Introduction
You’ve finished a long day of work, and as you stand up, you feel it: the dull ache in your lower back, the tightness in your shoulders, the faint throb in your wrists. For millions of professionals, this physical toll has become a normalized part of the workday. Many of us try to solve the problem by investing in a single “ergonomic” product, like a fancy chair or a specialized keyboard, only to find the discomfort lingers. Why? Because true ergonomics isn’t about one magic item; it’s about the entire system. A world-class keyboard on a desk that’s too high is still a recipe for wrist pain. A perfect chair in front of a monitor that’s too low will still lead to a sore neck. This guide will walk you through setting up your entire workspace as a cohesive system, from the ground up. By following these steps, you can create a space that adapts to your body, not the other way around, transforming your workday from a source of strain into an experience of comfort and focus.
Step 1: Start with Your Foundation – The Chair
Everything starts with how you are seated. Your chair is the foundation upon which your entire posture is built. Before you even think about your desk or monitor, you must adjust your chair correctly.
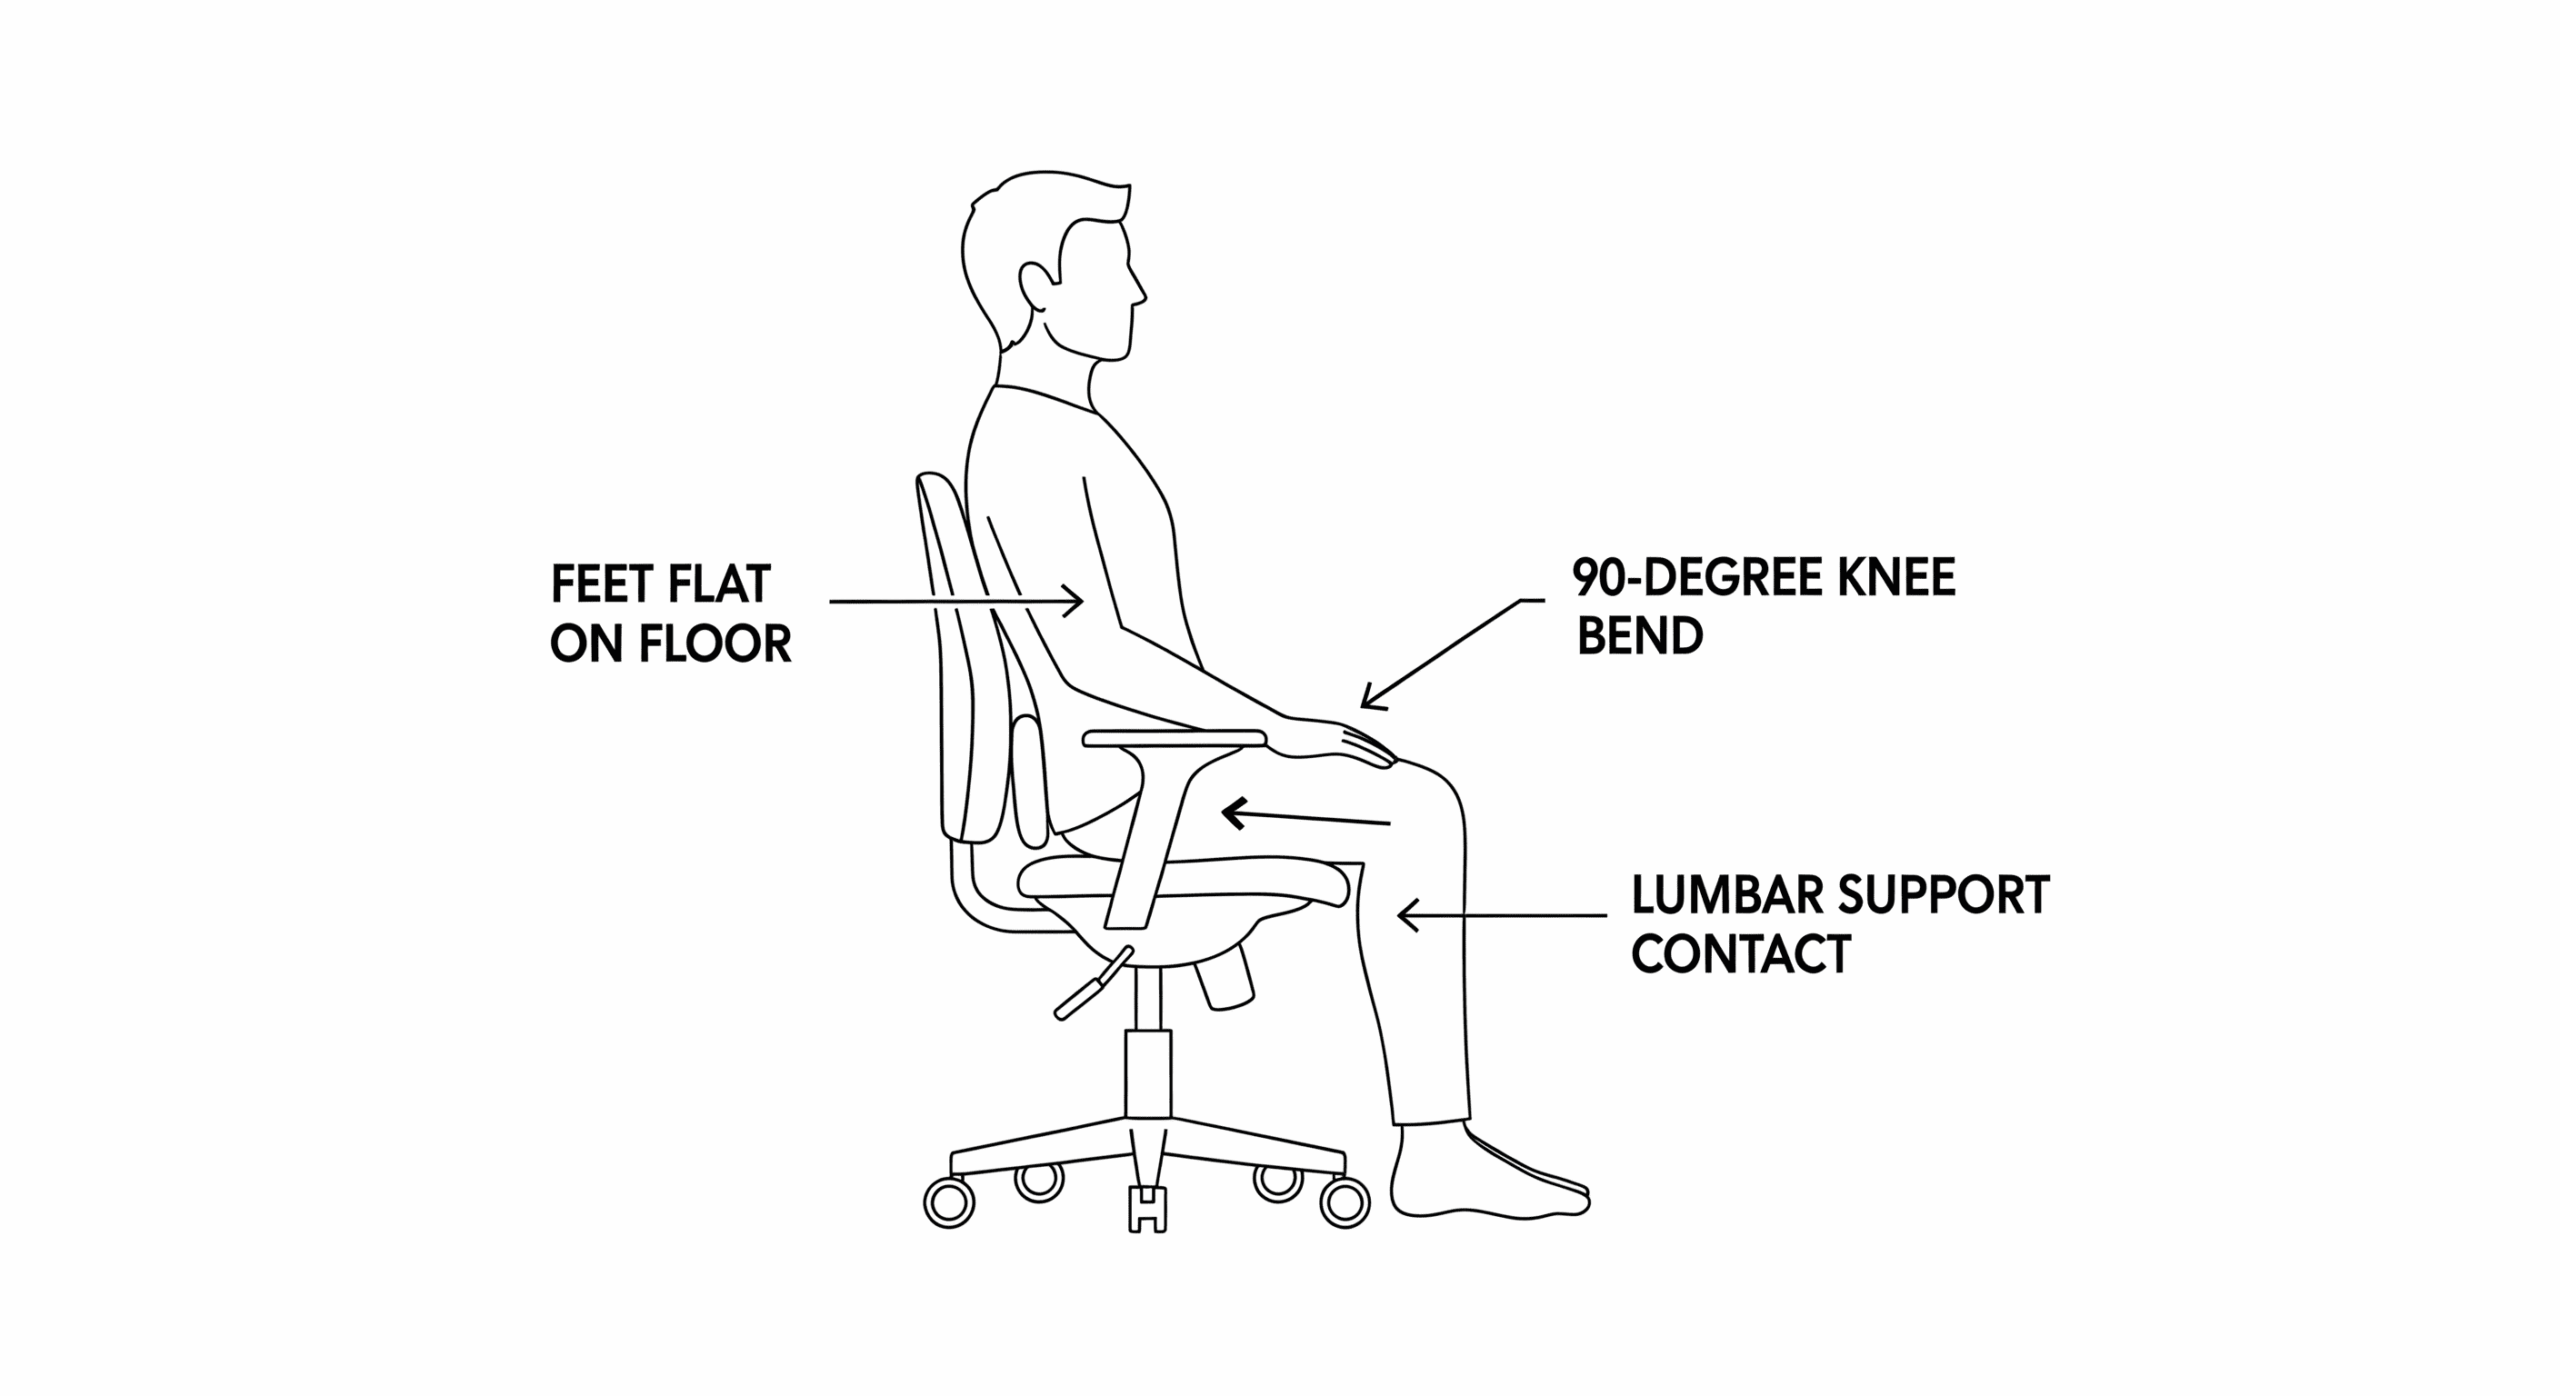
First, sit down and plant your feet firmly on the floor. If they dangle, use a footrest. Your goal is to create a stable base.
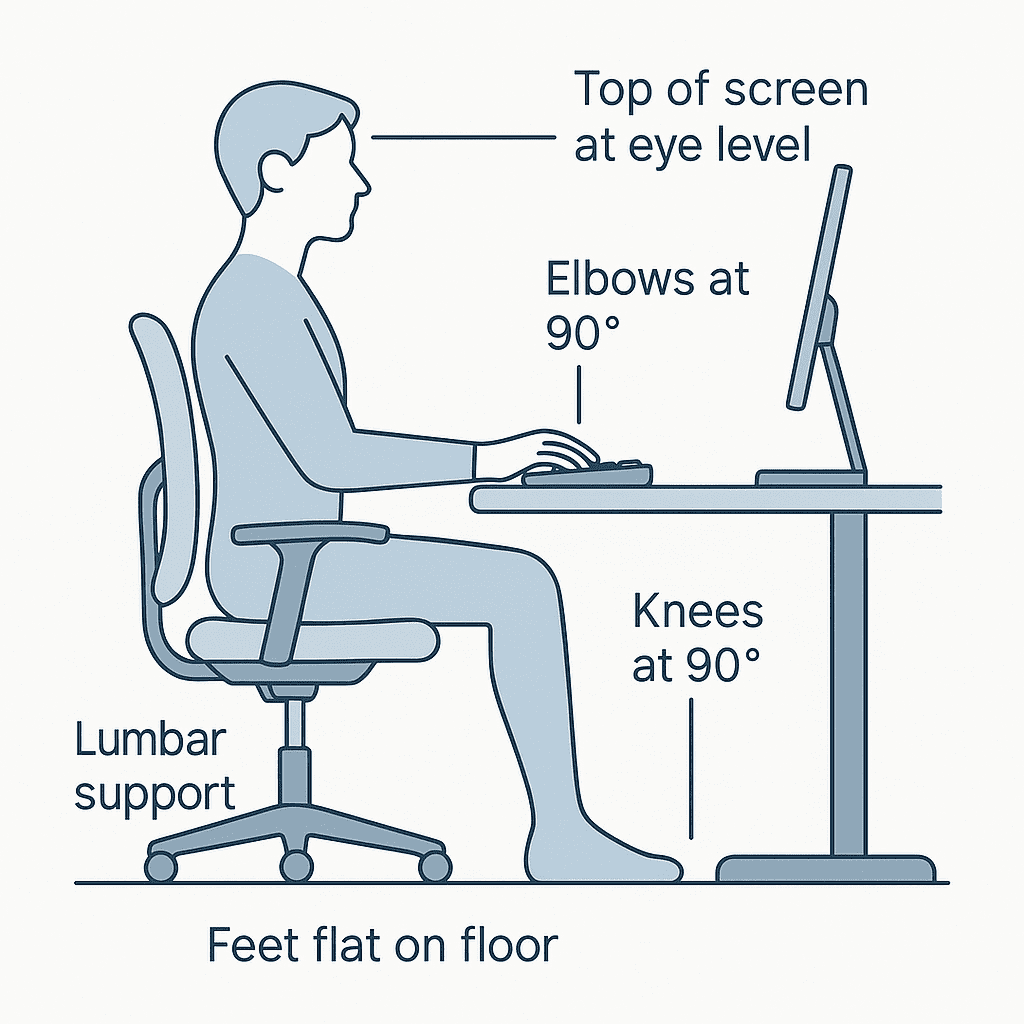
- Adjust Chair Height: Raise or lower your chair until your knees are at roughly a 90-degree angle, with your thighs parallel to the floor. This position promotes healthy blood circulation and reduces pressure on your lower back.
- Ensure Proper Depth: You should be able to fit two or three fingers between the back of your knees and the edge of the chair. If the seat is too deep, it can cut off circulation; if it’s too shallow, it won’t provide enough support.
- Support Your Back: Sit back fully so your spine is resting against the backrest. Adjust the lumbar support so it fits snugly into the natural curve of your lower back. This is the single most important adjustment for preventing lower back pain. Your back should be at a recline of roughly 100-110 degrees, not ramrod straight at 90 degrees, which can also cause strain.
Only when your chair is correctly positioned should you move on to the next step.
Step 2: Set Your Surface – Desk and Keyboard Height
Now that your body is properly supported, it’s time to bring your desk and keyboard into the equation. The golden rule here is to bring the desk to your hands, not the other way around.
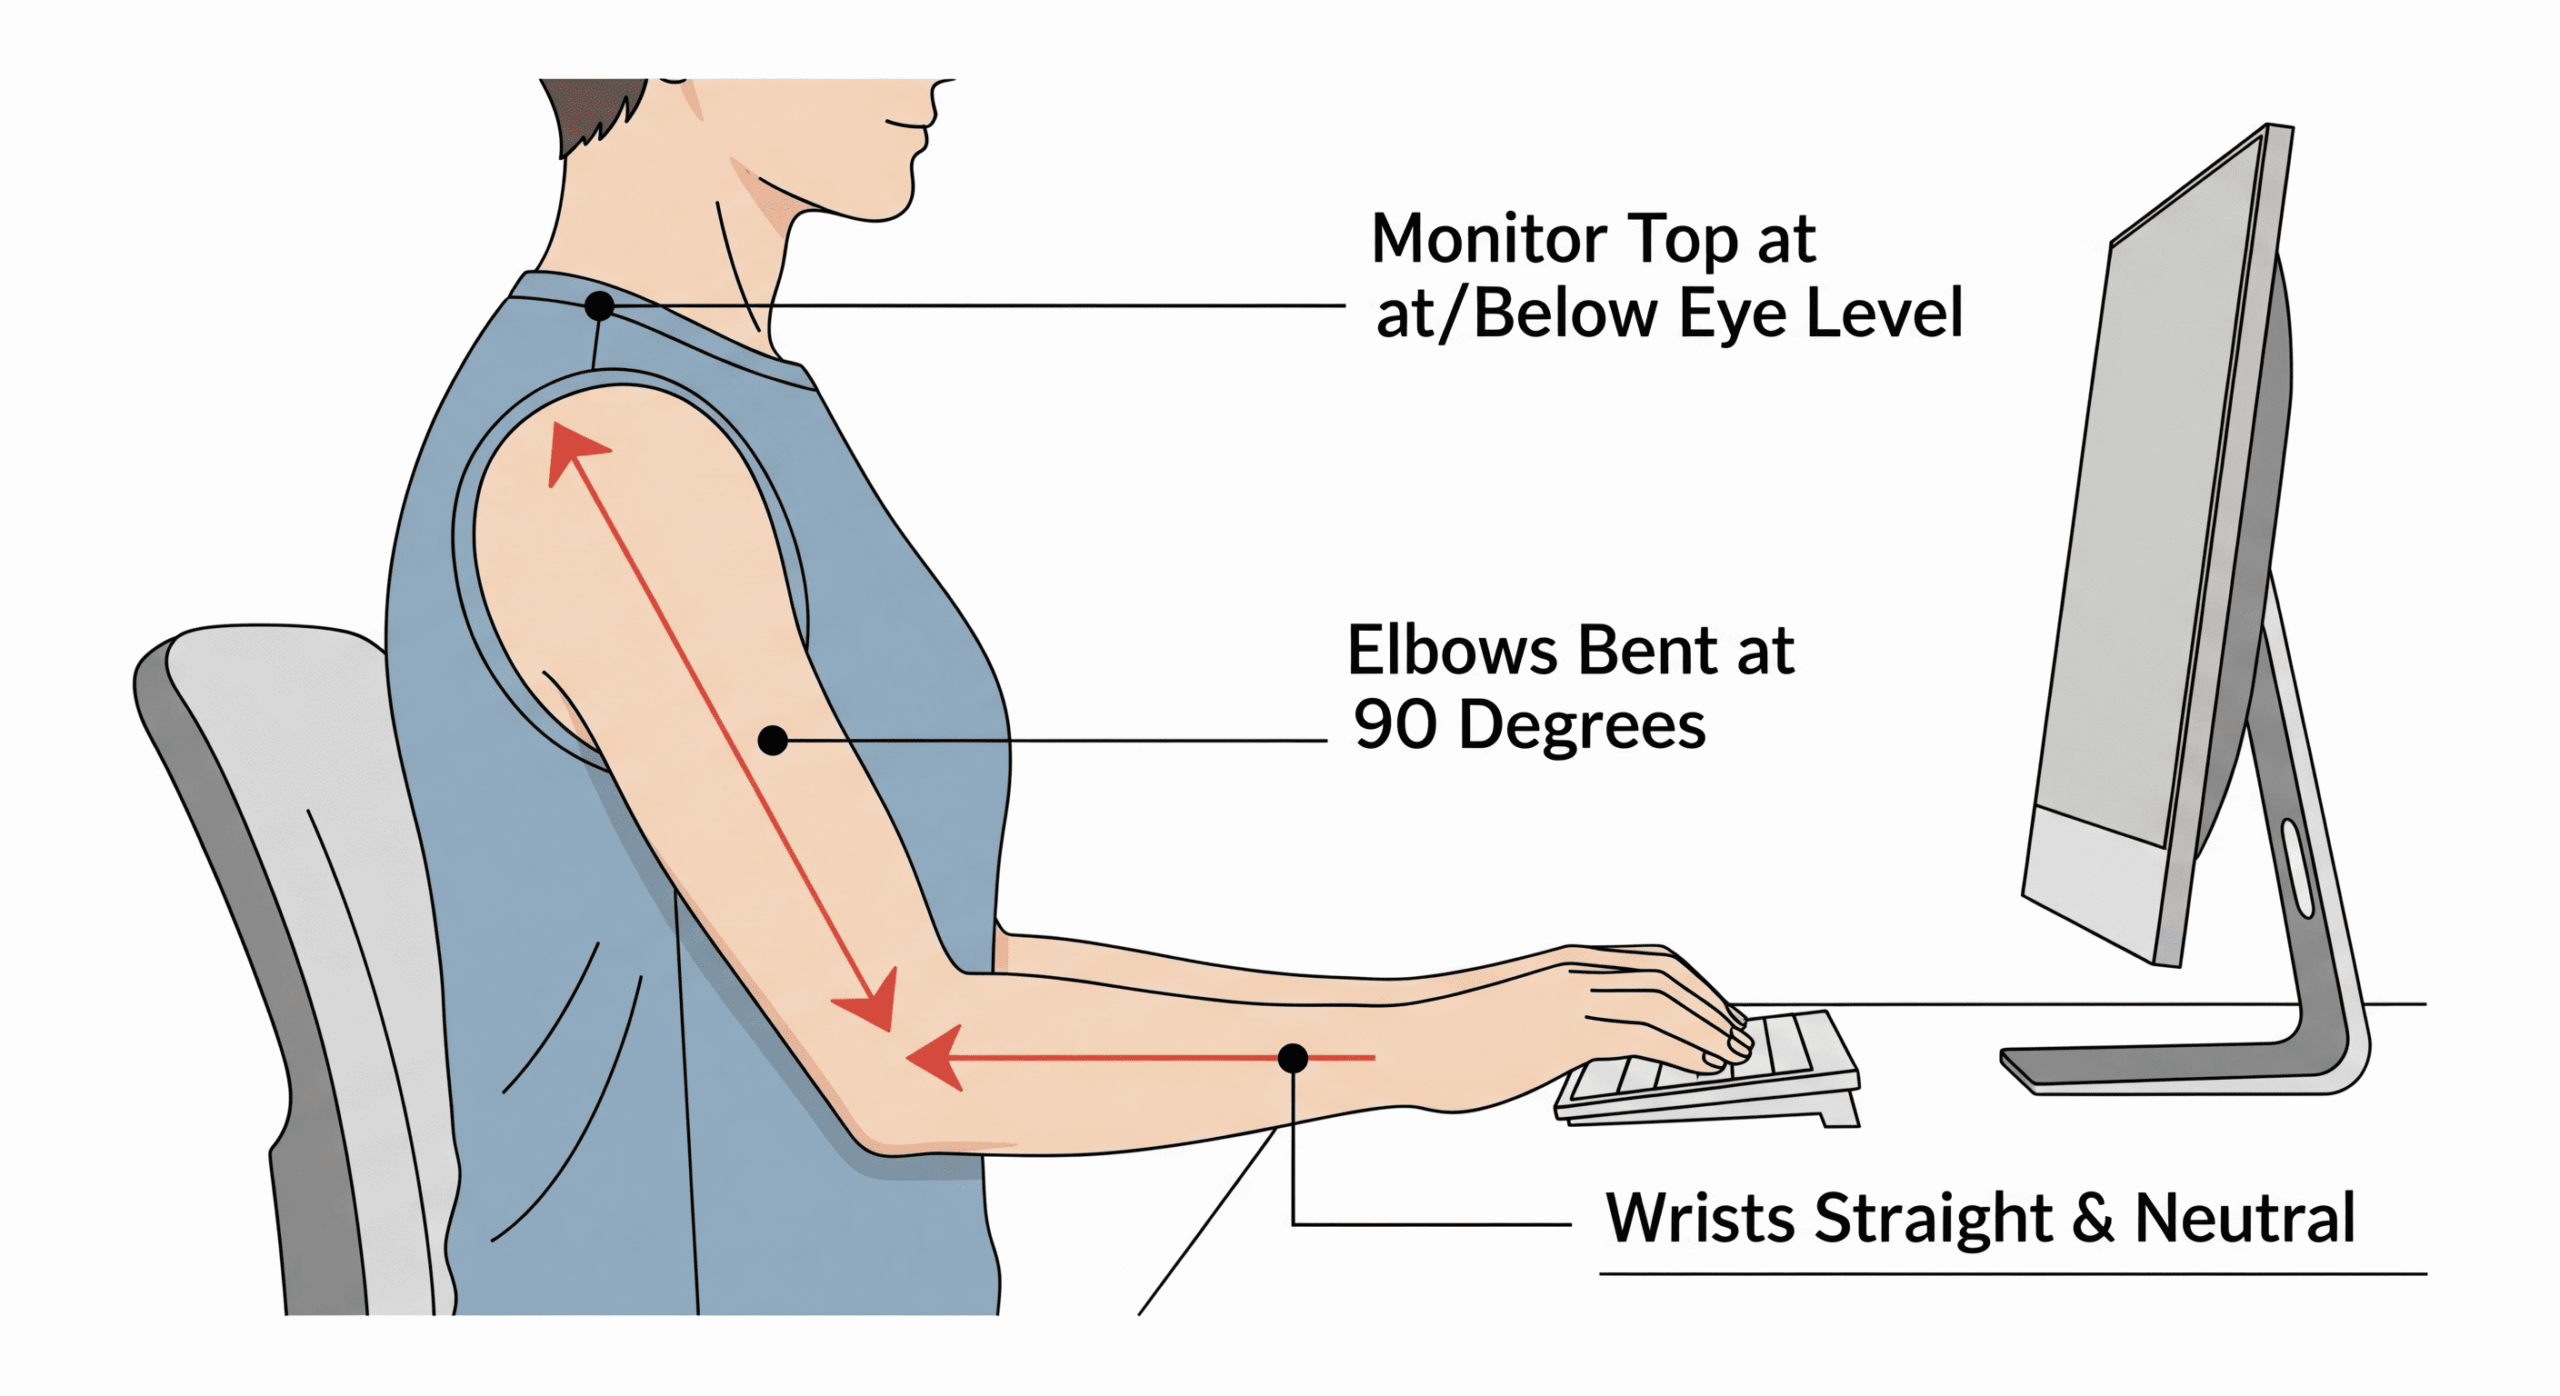
With your shoulders relaxed and your back against the chair, let your arms hang comfortably at your sides. Now, bend your elbows to a 90-degree angle. This is your ideal typing height.
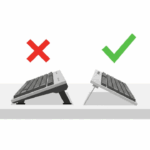
- Adjust Your Desk/Keyboard Tray: Your keyboard should be positioned so that your hands rest on it with your elbows at that 90-degree angle and your wrists perfectly straight. If your desk is too high and not adjustable, your best option is to raise your chair and use a footrest. If your desk is too low, you may need to place risers under its legs.
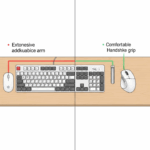
- Keep Wrists Straight: Your wrists should not be bent upwards or downwards when you type. They should float in a straight, neutral line from your forearm to your fingers. Avoid resting them on a hard desk edge, which can compress nerves.
Step 3: Align Your Gaze – Monitor Placement
Incorrect monitor placement is the primary culprit behind neck and shoulder pain. Many people work on laptops, forcing them to hunch over for hours. If you use a laptop, connecting it to an external monitor and keyboard is one of the best ergonomic investments you can make.
- Set the Height: Position your monitor so that the top edge of the screen is at or slightly below your eye level. You should be able to look at the center of the screen by glancing down slightly, without having to tilt your head. Use a monitor stand or a stack of sturdy books to achieve the right height.
- Check the Distance: Your monitor should be about an arm’s length away from you. If you can comfortably touch the screen with your fingertips when sitting back, you’re at a good distance. This prevents both eye strain from being too close and leaning forward from being too far.
Step 4: The Ergonomic Checklist
Let’s consolidate everything into a simple checklist. Use this to audit your current setup. The goal is a series of 90-degree angles, often called the “90-90-90” rule.
Step 5: Don’t Be Static – The Importance of Movement
A perfect ergonomic setup is not meant to keep you locked in one position all day. The human body is designed to move. A static posture, even a good one, can still lead to discomfort.
- The 20-20-20 Rule: To combat eye strain, every 20 minutes, look at something 20 feet (about 6 meters) away for at least 20 seconds. This gives your eye muscles a much-needed break from focusing up close.
- Take Micro-Breaks: At least once an hour, stand up, stretch, walk around for a few minutes. Refill your water, do a few shoulder rolls, or just stand and look out a window. These small breaks are crucial for blood flow and muscle relaxation.
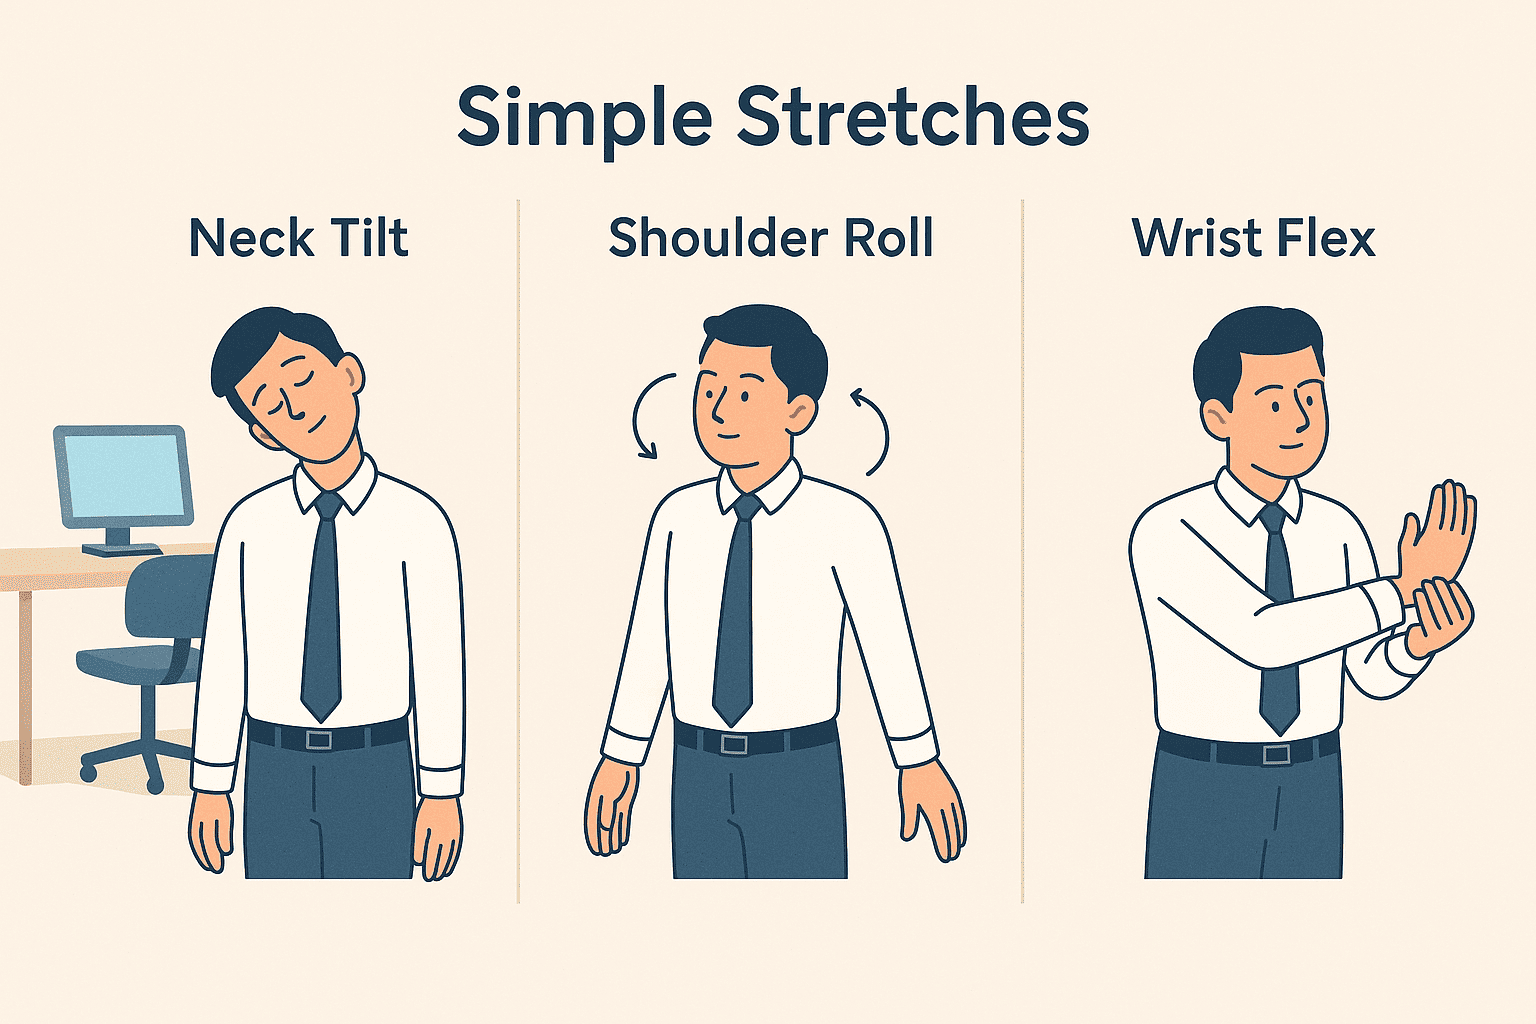
- Consider a Standing Desk: Alternating between sitting and standing is an excellent way to stay active. If you have a sit-stand desk, aim to switch positions every hour or so.
Conclusion
Creating an ergonomic workspace is a process of mindful adjustment. It’s about listening to your body and creating a setup that serves you, fostering health and focus throughout your workday. By following this step-by-step guide—starting with your chair and systematically aligning your desk, monitor, and keyboard—you build a system where each component works in harmony. Use the checklist provided to audit your space and make small, incremental changes. You don’t need to achieve perfection overnight. But by taking these principles to heart, you invest in your most valuable asset: your long-term health and well-being.